Setting up your sites and checks
Adding sites, changing the list of checks, setting limits, and what to be careful about when renaming.
Settings is where the audit becomes your audit: your sites, your checks, your limits. Entry accounts only.
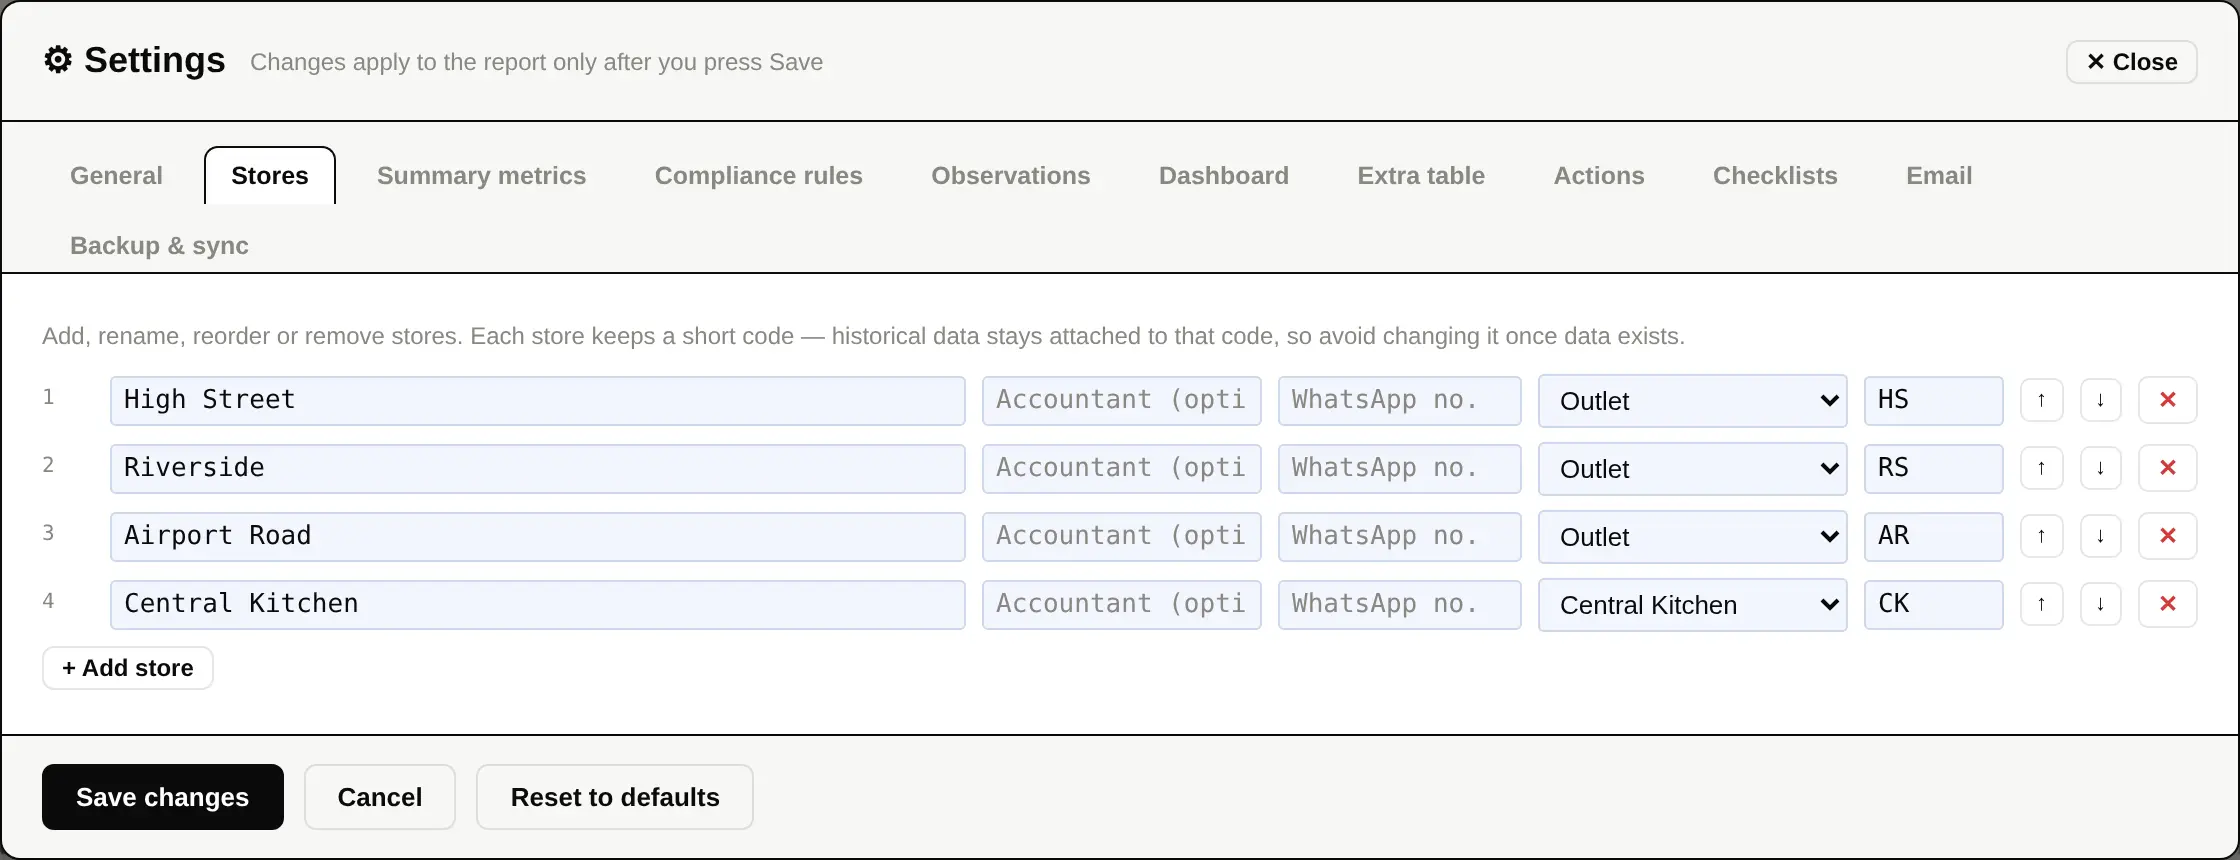
Sites
- Open Settings ▸ Stores.
- Press + Add store, give it a name and a short code, and say whether it is an outlet, a kitchen, or both.
- Save.
The code is the important part. Every saved figure is filed under it, so a code is a permanent thing. Renaming a site is free; changing its code once it has history is not something to do casually.
Checks, weights and limits
| Compliance rules | The checks themselves, each critical, major or minor, and which kinds of site they apply to. |
|---|---|
| Summary metrics | The figures you enter each day. |
| Observations | The list of scenarios offered when adding an observation. |
| Actions | Whether corrective actions are raised, from what date, how many days are allowed for each severity, and whether repeats escalate. |
| Dashboard | Target score, damage and void limits, which panels appear and in what order. |
| General | Cash limit, grade boundaries, which report sections appear and in what order. |
Sharing your settings with other devices
Settings live with your account, not with one browser. Saving publishes them so the next device sees the same sites and the same checks. If a site is still named after its own code — the placeholder a recovered site gets — the settings are held back until it is renamed, and the sync log says which ones are holding it up.